Is That Your Hair? How to Make Your Wig Look Natural
Are you intimidated to wear a wig? We thought you might be so here is how you can make your wig look so natural, people will think it is growing from your scalp.
With numerous options between 360 frontals, closures, U-Part and V-Part wigs it is no wonder installing a wig can be a daunting task for most women. And although wigs have evolved dramatically over the past 20 years, we still don’t want that fake, "wiggy" look. Even worse, who has time to hassle with glue and laying down baby hairs? Not us!
Let’s break down how to wear a closure wig and make it look so natural that women all over will be asking "Is that all your hair?"
Step 1: Shampoo and condition new wigs upon arrival
When you first get our wigs (or any new wig), we suggest shampooing and conditioning before installing the unit. Although we shampoo all of our wigs prior to shipping, this step is important so you can set your part, which is easy to do while shampooing. Remember to always shampoo in a downward motion to prevent tangles and matting.
So what type of shampoo should you use? Use a clarifying shampoo to remove build up - especially if you have worn the wig a few times. This shouldn't occur with a new unit, but washing with a clarifying shampoo will also allow you to achieve clean flowy hair with lots of volume. Follow up with conditioner, and rinse normally.
Step 2: Set the part & dry the wig
As mentioned in step 1, setting the part is easier to do while the hair is wet vs. dry. This step is so important because wherever your part is on the wig is where you want to set your part with your natural hair. Choose a part location you feel the most comfortable or maybe a part location you normally wear to achieve a natural blend.
To make it easier on yourself, purchase a mannequin head so you can easily comb and part the wig. If you can air dry the wig that is a great option but blow drying the wig will work well as demonstrated in the video above.
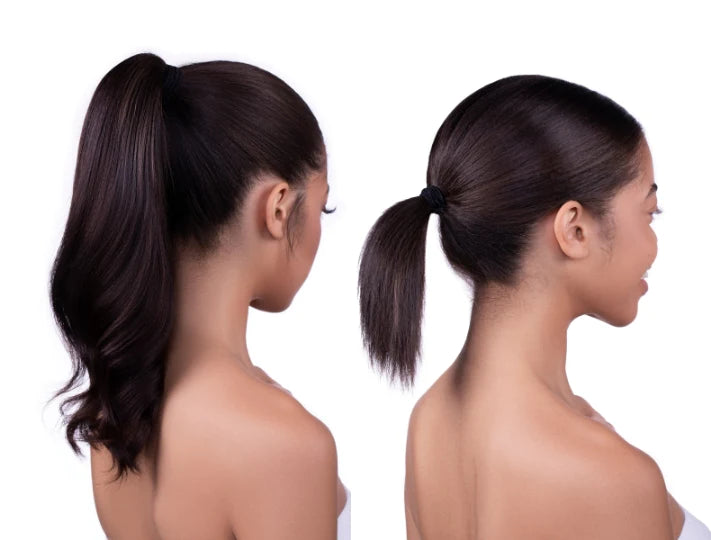
In addition, determine how long you want the part while the hair is wet. The length of your part also contributes to how natural the wig can look.
Step 3: Straighten the wig & flat iron strategically
To straighten your wig, flat iron in really small sections ironing one track at a time - no more than two. If you flat iron really large sections you can miss the opportunity to get a really sleek look and you might believe the quality of the hair is not that great. No one wants that.
We recommend the Go Sleek 1.5 inch ceramic flat iron that heats up to 450 degrees for a really straight, silky finish.
Be sure to flat iron the wig in the direction you want the hair of the wig to lay. For example, if you have a middle part you will flat iron to the right in a downward motion, to the left in a downward motion and finally down the back. This ensures the wig is nice and flat for the most natural finish, which is what we want!
Step 4: Cut & trim the wig
If you are not skilled in hair cutting, do not be afraid to take your wig to a professional stylist. This will ensure your wig is framed to your face shape and you get the most desired look for your wig. A stylist can cut layers if needed and remove bulkiness if the wig overpowers your face. Remember we are trying to make our wig look natural.
If you have some skills with cutting hair on your own, simply trim the wig for split ends and finish with a length that works for you.
Step 5: Pluck the part (no bleaching required)
For this part you will only need tweezers - not bleach. Contrary to popular practice, we do not recommend bleaching knots of your closure as it will shorten the lifespan of the lace. Bleaching can sometimes also reveal an orange or brass colored appearance which is the opposite of what we want in a natural wig look.
Plucking is the process of making the standard wig part appear more natural and spaced, similar to how the part appears in your natural scalp. Since the purpose of this process is for the wig to look natural, you must determine how much plucking is needed to look just like your scalp.
Before you pluck the part, put on the wig unit and line up the wig part with the part in your natural hair. If you place the wig on your head and the two parts aren’t aligned, simply re-adjust your part before you pluck the wig.
This step is important especially if your hair is braided down. If you pluck the part too early that could result in you being stuck with a part that does not match up and the wig will no longer appear natural.
Now grab your tweezers and start plucking! Grab one strand of hair at a time and pull the hair directly out of the wig part. Take your time and do not over pluck during the first try. Once you install and you feel like the part can be plucked more feel free to do so. Be very gentle to ensure you don't poke a hole in the lace.
Step 5: Cut the lace
Cut straight across to remove the extra lace before installing the wig. Once you install the wig, you will be able to determine if you need to cut more. There is not a special science to cutting the lace since we will be leaving a bit of our natural hair out for a seamless blend.
Some hair professionals suggest cutting in a zigzag pattern so the wig hair line appears more natural; however, that is usually for if you have a frontal that needs to be glued down. Since our wig will start behind the hairline, a specific cutting pattern is not necessary.
Step 6: Install the wig slightly behind your hairline for the most natural look
Installing the wig slightly behind your hairline is the trick to a natural look. However, you need to make sure the wig has a nice, snug fit and the part lines up perfectly. Wigs come with several different adjustments inside - combs, hair bands, elastic ties, etc.
If your wig comes with combs inside, first hold on to the wig combs while sliding the wig on, sliding the wig on from back to front. Holding the combs prevents them from digging into your braids before the wig is lined up perfectly.
Next, as you are holding on to the wig combs, line the wig part to your natural hair, strategically placing a wig about an half-inch behind your hairline. See the video above for step by step.
Finally, once the wig is lined up perfectly, slide the combs gently below your braids. The combs are important because even if someone pulls your wig it is not going to come off. If the combs bother you also try only tucking two of the five comb sections into the braid instead.
Step 7: Adjust and finish style.
If you feel your part isn’t seamless and lined up perfectly to your natural part, you probably need to cut more lace or tighten the wig straps provided. When you have both parts lined up perfectly, continue to adjust and comb the section of your hair that has been left out around your hairline so it blends into the wig.
If you need to pluck the part a little more once the wig is properly placed please do so. Lastly, curl, style and enjoy!
Other important tips:
- Do not scratch directly into the closure with sharp objects (nails, combs) if your scalp itches. Gently lift the wig and scratch your scalp to prevent tearing holes into your wig closure.
- Color your wig to match your hair color for the most natural look. If the wig you desire does not come in the color you need feel free to change that. As most wigs come in a natural black, don’t be afraid to ask a professional stylist to color your wig for you.
- Store your wigs properly for longevity. Our velvet luxury hair extensions storage bag which is lined with satin is a great way to keep your extensions in a safe place where they won’t dry out.
Are you ready to try this yourself? If not, head on over to the Haus of Go Sleek and so we can install your next unit! We recommend the Deep Wave Closure Wig Unit, which is used in the video above.